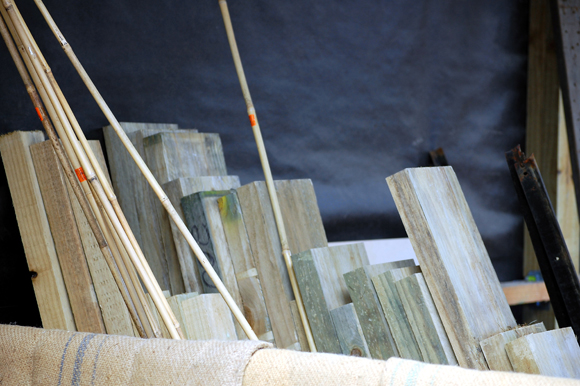
Remember this pile of wood? Of course you do. If you don’t read to the end of this previous post and you’ll be up to date.
Let’s just skip over why it’s taken me so long but I couldn’t put it off any longer today was the day to dust off my DIY skills.
For weeks and weeks I’ve become increasingly frustrated that the vegetable waste, flower heads and other miscellaneous compostable debris has been sent to the landfill in my wonderful wheelie bin. As continue to harvest from the potager it was more and more pressing that we got our composting arrangements in order.
You’d think it would be easy to buy a composting bin. I don’t want any old composting bin but something made from wood that will last us a long time. After much research on the Internet I found instructions and having bought the wood set too with my wood, hammer and nails.
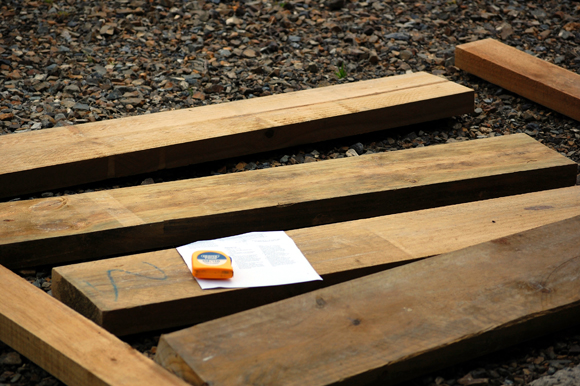
First up you need to check you’ve got all the necessary wood. All the right lengths in accordance with the instructions.
I’m making a New Zealand compost box first invented by Sir Albert Howard. To make the sides you lay out your slats on the uprights and hammer them together with nails. Taking care to keep things in alignment – best to mark them out and use a spirit level – which I didn’t. Heck, this is a compost bin not a bach for the chickens.

You keep adding the slats until you have a complete side. At this point you declare a tea break and send the husband to town to buy you more nails since the supply you had in stock had been used up for the emergency chicken house building.
Actually tea breaks are for slackers. Here at Domestic Executive HQ it’s head down no time for resting. Time to get out my favourite DIY toy. I mean power tool.
Hmm, doesn’t she look marvellous. And what a performer. Slices through wood like the knife went through my finger earlier this week. Oh, sorry that’s just made me curl up, that’s a gross thought.
In all seriousness. Powertools are not to be messed with. I’m very careful to wear safety goggles, ear defenders and obsessive about where my fingers, toes and body parts are in relation to that fast moving blade. MTs cousin had a terrible industrial accident a few years ago that makes me fearful of saws. He’s made a remarkable recovery after the miracles of medicine were able to reconstruct his hand. Health and safety notice over. You get my point.
So ready to roll again. All the wood now cut to length. All stacked ready for production.
All done with the help of my bassets who carried one end each. Yeah right!
Although Fortnum did show some marginal interest when I asked him to help. He was a little sleepy and got “How about a little work” confused with “How about a little walk!”
So after trying to out compete the builders of our neighbours house on the hammering I finally ended up with two sides constructed. Then the tricky part. Where to site them. And location is everything as these things weigh a ton and whilst I’m happy for a bit of weight training I only wanted to locate them once. This definitely required a household board meeting and a cuppa.
So little basset and I decided we’d put the compost bin behind the barn. He supervised the positioning and lay guard whilst I continued to lug bits of wood and nail the back in place.
And after the back panels are installed and front facing prepared this is what you get.
Want to see it closer? Oh good, I knew you’d ask. Here’s another view.
Impressive eh! Here’s a close up on the front area where wood will slot in place to keep the compost in and can be easily removed when it’s time to take the compost out. These small blocks of wood are just the prototype. I’ll be putting full planks in.
And here it is in it’s final glory. I was just about to start filling it up when I thought I better check with MT that he was happy with the decision little basset and I made. After all I don’t want to be shovelling in the chicken muck and then moving it all again.
I’ll let you into a little secret. This compost bin ain’t going anywhere, whatever anyone says. This thing weighs a ton. I’ve lugged enough wood around today to satisfy the personal trainer in me and I’m refusing to budge it one inch.
I’m so excited to have crossed another job off my to do list. More importantly I’m ecstatic that I’ll finally be able to start putting out the kitchen compostable waste into the bin to return it to the soil next year. Oh how our vegetables are going to thrive.
Oh, one last secret. I am not, I repeat, not going into mass production. This is one DIY job that is relatively simple but does require some effort to lift the wood. Also, I’m not finished fine tuning this one. Geoff Hamilton has a nifty sloping and self leveling roof for his compost box in his kitchen garden DVD. I shall be studying that one more time to decide whether I’ll be venturing into the more advance carpentry or sticking with an old piece of carpet to go across the top of the pile.
Which way would you go? Fully installed, functioning and building code compliant roof. Or a manky bit of carpet that will do just as good? Do tell your innermost desires for a compost bin lid!
Very impressive construction. I’m the last person to give advice on compost bins as the bins I constructed 15 years ago have almost disintegrated. I say constructed not made because they were pretty Heath Robinson being made of 4 wooden pallets lashed together with rope on the concrete base in the hen run. To get the compost out or to turn it I undid the front pallet but they did do the job. One bin I covered with carpet that has now rotted into lots of plastic threads, maybe I left it too long, and the other bin I left open so the hens could have a scratch around in the scraps and weeds. One nasty surprise was the rats’ nest I discovered when I was turning the compost, yuk. One of the reasons I placed the bins in the hens’ run was to minimise the distance needed to carry out the old woodshavings and muck when cleaning out the hens. I prefer woodshavings to straw as they don’t get wet and nasty and I get them free either from the wood working dept up at the college or at a local joiner.
Yikes Ruta, rats in the compost. Good job ours is behind the barn away from the house. I’ve been using sawdust for the chickens but they don’t like it much. I’ll try and get some wood shavings from the timber processors in town. Great idea, don’t know why I didn’t think of that before now! JT
Sooooo…..when do you get time to rest??? You obviously dont drink copious amounts of alcohol like I do!! Ha ha, you are craazy! Amazing Julie, that ‘structure’ is worth it weight in gold. xx
I think that your bundle of joy in Bethany is what keeps you busy – oh and that drinking maybe. Loved your post about the westpac event! JT.